Chicken Rocket
  • Home
  • About
  • Seasoning and Care
  • Shop
  • Contact
  • More
    • Home
    • About
    • Seasoning and Care
    • Shop
    • Contact
  • Sign In
  • Create Account

  • My Account
  • Signed in as:

  • filler@godaddy.com


  • My Account
  • Sign out

Chicken Rocket

Signed in as:

filler@godaddy.com

  • Home
  • About
  • Seasoning and Care
  • Shop
  • Contact

Account


  • My Account
  • Sign out


  • Sign In
  • My Account

Prepare for liftoff!

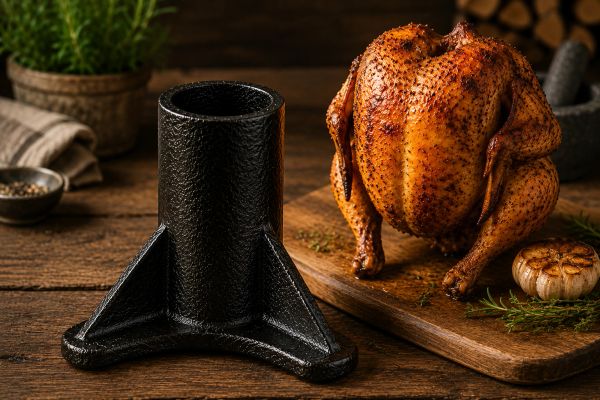
Your Chicken Rocket is proudly made in the heart of America and is built to provide years of juicy, flavor-packed poultry. Before your first launch, you'll need to season your Chicken Rocket to create a natural non-stick surface and protect it from rust.


The good news? It's easy.

What you will need -

  • Your Chicken Rocket
  • Baking Sheet
  • Warm water
  • Mild dish soap
  • Paper towels or lint-free cloth
  • High smoke point oil such as
    • Vegetable Oil
    • Canola Oil
    • Avocado Oil
    • Grapeseed Oil

Step 1 - Wash and Dry

Step 2 - Apply a Thin Coat of Oil

Step 2 - Apply a Thin Coat of Oil

Your Chicken Rocket may have residue from the manufacturing process or packaging.


Wash it thoroughly with warm water and a small amount of mild dish soap.


Once cleaned, dry it completely with a towel.


For best results, place it in a warm oven or on a grill for 5-10 minutes to remove any remaining moisture.

Step 2 - Apply a Thin Coat of Oil

Step 2 - Apply a Thin Coat of Oil

Step 2 - Apply a Thin Coat of Oil

Using a paper towel or cloth, apply a very thin layer of oil to the entire Chicken Rocket.


Don't forget:

  • The inside of the flavor chamber
  • The outside surfaces
  • The base and legs


Less is more. The surface should look lightly coated, not wet or greasy.

Step 3 - Fire It Up!

Step 4 - Repeat if Desired

Step 4 - Repeat if Desired

Pre-heat your grill or oven to 350°F.


Place the Chicken Rocket upside down on a baking sheet in a pre-heated grill or in an oven.


Heat for approximately one hour.


This process bonds the oil to the cast iron and begins building the protective seasoning layer.


Allow it to cool naturally in the grill or oven.

Step 4 - Repeat if Desired

Step 4 - Repeat if Desired

Step 4 - Repeat if Desired

One seasoning cycle is enough to get started.


For an even stronger finish, repeat the process 2-3 times.


Each layer helps create a darker, more durable cooking surface.

YOU'RE READY FOR LAUNCH!

Once seasoned, your Chicken Rocket is ready for action.


Fill the flavor chamber with your favorite:

  • Beer
  • Wine
  • Apple cider
  • BBQ sauce
  • Marinade blend


Then load up your chicken, turkey, or duck and get ready for some of the juiciest poultry you've ever tasted.

Caring for your chicken rocket

After each cook:


  1. Allow the Chicken Rocket to cool.
  2. Wash with warm water.
  3. Avoid soaking for extended periods.
  4. Dry immediately.
  5. Apply a light coat of oil before storing.


Over time, your Chicken Rocket will develop a rich, dark patina that's the hallmark of well-seasoned cast iron.

Pro Tip From the Chicken Rocket Crew

The more you cook with your Chicken Rocket, the better it gets.


Every cook adds character, every seasoning builds protection, and every meal becomes part of the story.


That's the beauty of cast iron.


Built for real fire. Built for real flavor. Built to last.

Copyright © 2026 Chicken Rocket - All Rights Reserved.

Powered by GoDaddy

  • Home
  • About
  • Seasoning and Care
  • Shop
  • Contact

This website uses cookies.

We use cookies to analyze website traffic and optimize your website experience. By accepting our use of cookies, your data will be aggregated with all other user data.

Accept